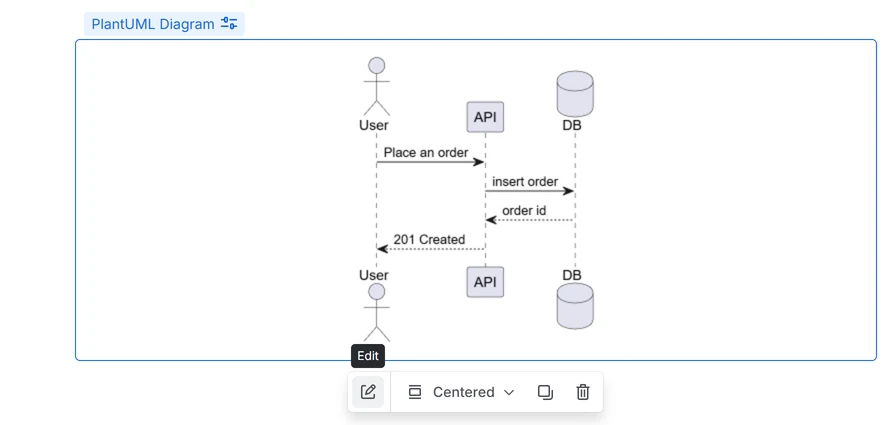
PlantUML in Confluence
Put a PlantUML diagram on a Confluence page in a few minutes. You type a few short lines, and the app draws the picture. No coding needed.
- Never written PlantUML? Start with Learn PlantUML, our beginner's guide.
- Know PlantUML already? The reference lists every kind of diagram and every limit.
- Writing Mermaid instead? See the Mermaid documentation.
Before you start
PlantUML is part of Mermaid & PlantUML Diagrams for Confluence, our diagrams app for Confluence Cloud. The app adds three items to Confluence's editor: Mermaid Diagram, PlantUML Diagram and OpenAPI Diagram (since 2.11.0; see OpenAPI in Confluence). They are one app, with one installation and one license.
Confluence calls an item like this a macro. You will see the word in some of Confluence's own messages.
If PlantUML Diagram is not in the list in step 2 below, the app is not installed on your site, or not at version 2.10.0 or later, the version that adds PlantUML. Ask a Confluence admin to add or update it (see For Confluence admins).
Add a PlantUML diagram
- Open the page and select Edit at the top. Or create a new page.
-
On an empty line, type
/plantumland select PlantUML Diagram. Typing/diagramlists the app's items. You can also select + (Insert elements) in the toolbar and search forPlantUMLthere.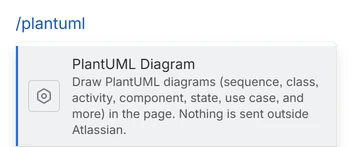
PlantUML Diagram is the only item in the list. -
The diagram editor opens by itself. Under
Examples, select the one closest to what you
want. Eight are buttons: Sequence, Class, Activity, Component,
State, Use case, Gantt and Mind map. More…,
beside them, lists 14 other kinds, such as Deployment, C4, Timing,
Network and Wireframe.
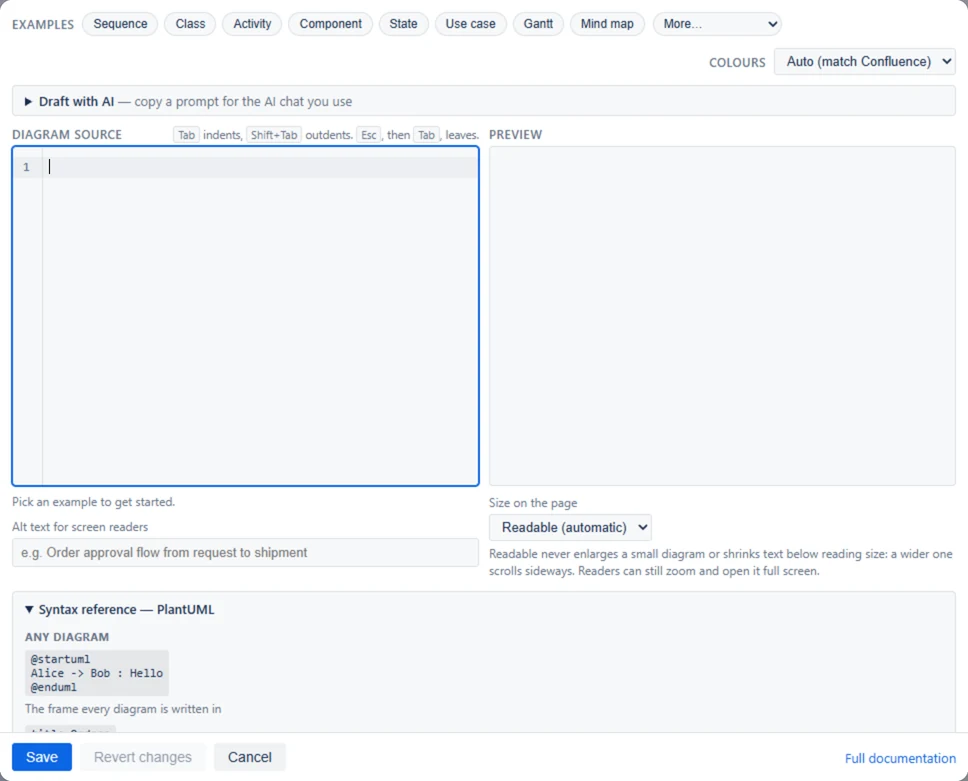
A new PlantUML diagram. The examples are along the top, with More… at their end. -
Change the words in Diagram source. In the
Sequence example, change the names and the words after each
colon. The Preview redraws as you type, and the
line under the text says "Diagram is valid."
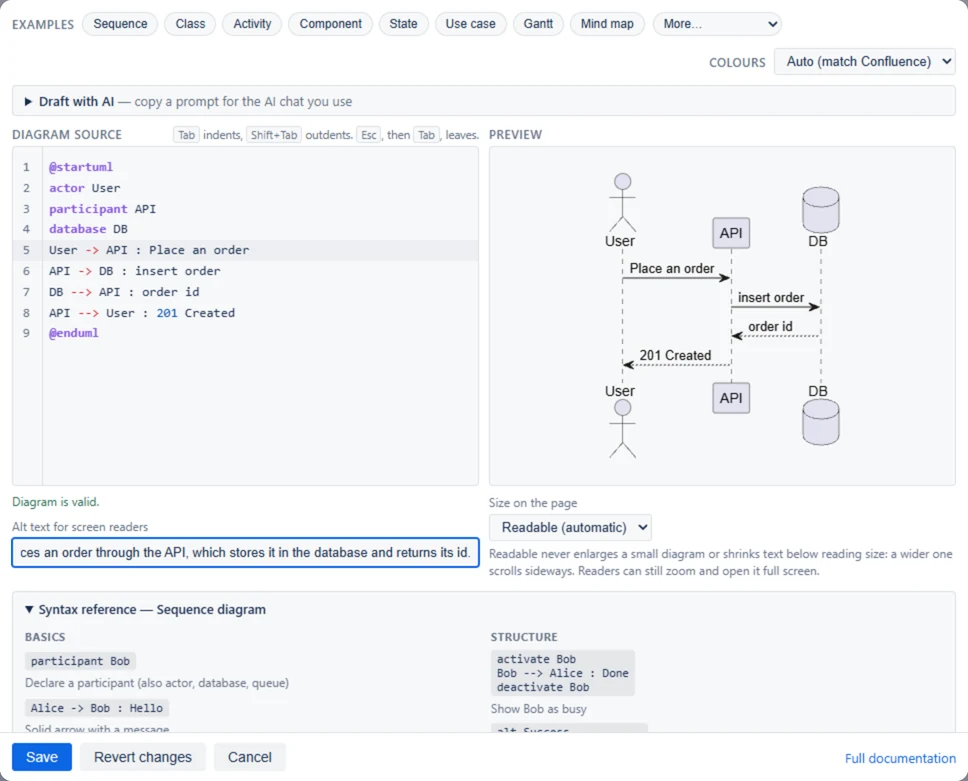
One message changed. The preview on the right has already caught up. - Optional: in Alt text for screen readers, describe the diagram in one sentence, for people who can't see it.
- Select Save, at the foot of the editor. The editor closes, and the diagram is on the page.
- Select Update at the top of the page to publish your change. On a new page, use the button in the same place.
If you pick another example when you already have text, the editor asks first: "Replace your diagram with the Gantt example?" Replace swaps it in, and Keep mine leaves your text alone.
New to PlantUML? The examples are the quickest way in: pick one, change the words, and watch the preview. Learn PlantUML explains each kind, one at a time.
Change a diagram later
- Edit the page.
- Select the diagram. Clicking inside it does not select it. Instead, point at the diagram's edge. When a gray frame and the label PlantUML Diagram appear, select the label. Or click at the end of the line above the diagram and press the down arrow key.
- Select Edit, the pencil in the small toolbar under the diagram.